


SHANGHAI FENGXIAN DISTRICT No.88 TOUQIAO FENGFEI ROAD.

China
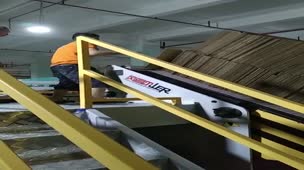
JUER Automatic Folder Gluer

JUER Automatic Folder Gluer

SLH-Ⅱ Semi-Automatice Pre-Feeder

SLH-Ⅱ Semi-Automatice Pre-Feeder

SLH-Ⅱ Semi-Automatice Pre-Feeder

SLH-Ⅱ Semi-Automatice Pre-Feeder

SLH-Ⅱ Semi-Automatice Pre-Feeder

SLH-Ⅱ Semi-Automatice Pre-Feeder
SLH-Ⅱ Semi-Automatice Pre-Feeder

SLH-Ⅱ Semi-Automatice Pre-Feeder

SLH-Ⅱ Semi-Automatice Pre-Feeder
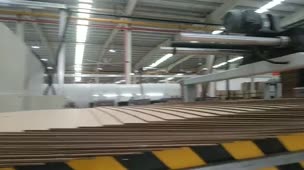
SLH-Ⅱ Semi-Automatice Pre-Feeder
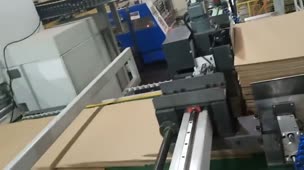
ASL-T Automatice Pre-Feeder

ASL-T Automatice Pre-Feeder

ASL-T Automatice Pre-Feeder

ASL-T Automatice Pre-Feeder

ASL-T Automatice Pre-Feeder

ASL-T Automatice Pre-Feeder

ASL-T Automatice Pre-Feeder

ASL-T Automatice Pre-Feeder

ASL-T Automatice Pre-Feeder

ASL-T Automatice Pre-Feeder

ASL-T Automatice Pre-Feeder

ASL-T Automatice Pre-Feeder

ASL-T Automatice Pre-Feeder

ASL-T Automatice Pre-Feeder

ASL-T Automatice Pre-Feeder

ASL-T Automatice Pre-Feeder

ASL-T Automatice Pre-Feeder

ASL-T Automatice Pre-Feeder

ASL-T Automatice Pre-Feeder

ASL-T Automatice Pre-Feeder

ASL-T Automatice Pre-Feeder

ASL-T Automatice Pre-Feeder

ASL-T Automatice Pre-Feeder

ASL-T Automatice Pre-Feeder

ASL-T Automatice Pre-Feeder

ASL-T Automatice Pre-Feeder

ASL-T Automatice Pre-Feeder

ASL-T Automatice Pre-Feeder

ASL-T Automatice Pre-Feeder

ASL-T Automatice Pre-Feeder

ASL-T Automatice Pre-Feeder

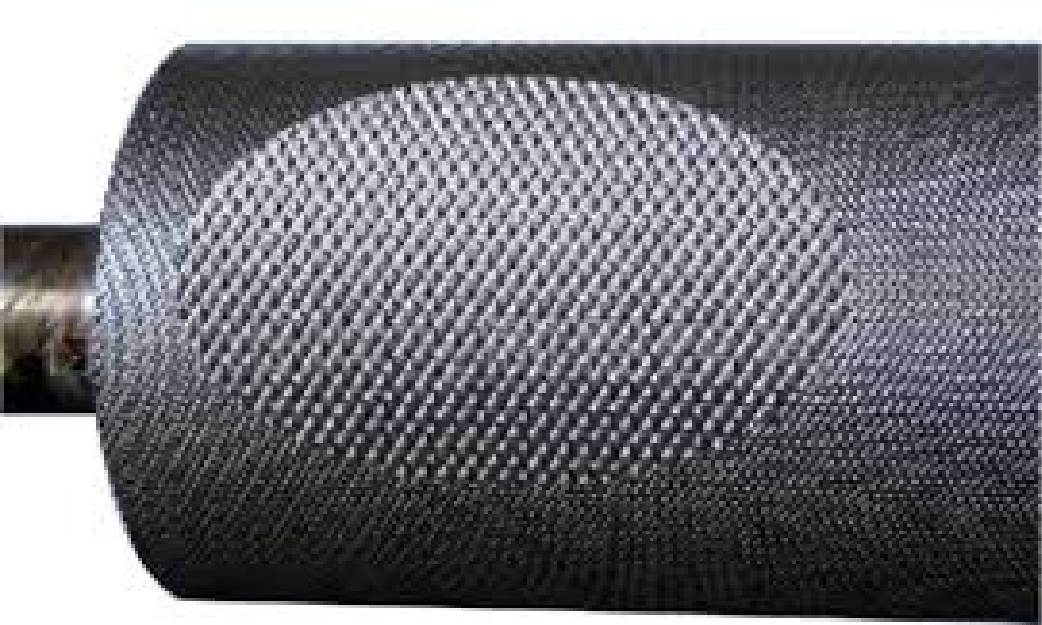
How to minimizing anilox scoring
The best way to minimize anilox scoring is a good care and maintenance program that includes the anilox roll, the chamber system, the ink department, the parts cleaning department and the pressroom environment. Additionally, adopt and maintain sound operational practices. Establish a checklist as part of your operation that includes the following:· Keep aniloxes clean: establish scheduled, verifiable cleaning of anilox inventory. Anilox rolls should be inspected for cleanliness and if they need attention, they should be cleaned as soon as possible. Use an ultrasonic cleaning system monthly.· Fix aniloxes with chipped ends: Chipped ends will wear chunks of metal particles from the doctor blade and they will go into the ink system.· Select a good quality doctor blade: Steel, Stainless, Synthetic or Composite· Establish monthly Ink Fountain maintenance: Check chambers for vertical and horizontal alignment. Check doctor blade assemblies are functioning correctly, springs changed if defective.· Keep ink Fountain fittings cleaned: As part of the monthly maintenance program.· Keep chambers aligned: Use a 0.005" plastic feeler gauge to test contact of the upper and lower blades to the anilox roll. Do this without the installation of end seals.· Establish a schedule: For changing doctor blades based on the amount of wear.· Establish practices to minimize excessive chamber loading pressure: Change seals when leaking starts, change blades on a regular schedule and select the correct anilox roll for the right color instead of adding additional pressure to achieve colour.· Reset the chamber pressure when changing to a new doctor blade: Unless adjusted, the chamber pressure will be set for a worn doctor blade and with a new blade the excessive pressure will quickly create metal slivers in the ink system.· If 'stops' are available on your stations, use them: This will prevent the chamber from contacting the anilox roll· Keep pumps in good operating condition. And check filters are fitted where available.· Select the correct doctor blade tip for your application.· Always tighten doctor blades by starting from the center and going out.· Cut doctor blades to correct length: Doctor blades hanging over the length of the anilox roll will contribute to end seal leakage and will wear a deep groove on the contact area on the overhang.· Keep the press area clean!The last point - 'keep the press area clean' - will reflect the totality of your work environment and work ethic. A clean pressroom area is almost always a reflection of a well-maintained production area. Adopting and maintaining good practices throughout your pressroom will help minimize scoring issues. Ongoing training and verification of proper procedures is imperative, especially when there is an employee change. Frequently when experienced staff members move up or move out, the value of care and maintenance practices is lost. Make those practices a part of your standard operating procedures and part of an ongoing training program.Scoring can be a costly challenge if left unchecked. Hopefully, the issues covered in this article will help to minimize that challenge, and provide you with enough Information to determine and fix the source of any scoring issues you may encounter.
1226 views0 0
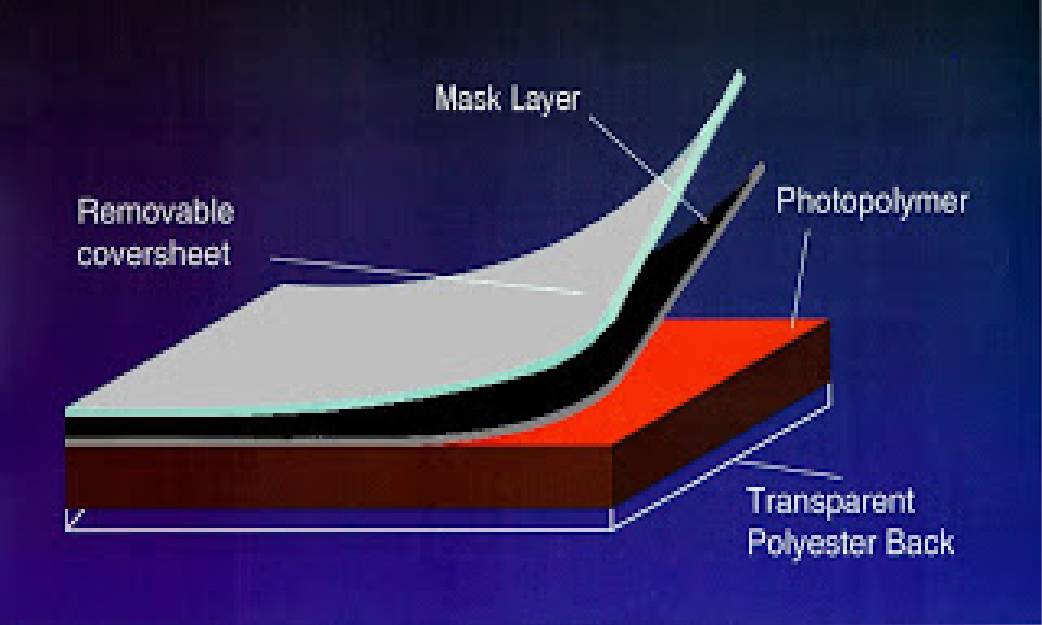
Quality Control in Flexo Platemaking
Flexographic printing is continuously evolving, and the platemaking process is seeing this exponentially. Platemaking is evolving not only in the development of new and innovative materials but also in the technological improvements of imaging and processing equipment. Together these make a more efficient and consistent workflow to deliver high-quality plate that can consistently reproduce the information of a digital file in its finished structure.All of us have been familiarizing ourselves with terms such as high definition, high resolution, surface screening pattern, and flat-top dot, among others. The reality is that ALL suppliers in this field have achieved a synergy, bringing about a complete revolution making the flexo printing process more competitive compared to other technologies such as rotogravure and offset.However, in an environment that tends to become more automated, there are still uncertainties in the manufacture of the plates and even returns of the finished product.In this post, we will review the procedures, tools, and criteria that can be used to maintain an adequate environment in digital platemaking based on the golden rule...“What cannot be measured cannot be controlled". What to measure? How to measure it? How often? Are some of the questions that will serve as a starting point to deliver a finished product that meets the user's expectations.Quality ControlBroadly speaking, quality control includes a combination of procedures designed to monitor and validate effective "acceptance/rejection" criteria in key stages of a process:1. First, identify the variables that have the greatest impact on the process or workflow. These will then become the key control points for the process.1. By finding the key control points we can ensure quality at critical stages in the workflow and reduce the opportunity for defects downstream in the process.2. Define standards to use "acceptance / rejection" criteria.1. Due to the physical limitations of the process involved, tolerances must be established for these standards.3. Measurements are taken at these key control points to verify the process and conformity of the product to these standards.A benefit of establishing measurement standards is the increased opportunity for a consistent and successful process or product. In addition, the key control points ensure that any defective product is identified in the earliest stages of the workflow.Image 1. Digital Plate ConstructionKey Control PointsA digital plate is processed without the use of a negative film. On the surface of the sheet material is a thin carbon layer that is removed using a laser ablation technique in conjunction with a 1-Bit TIFF file. After ablation, the carbon layer acts as a negative or mask, blocking ultraviolet light during the exposure process. The processing stages of a digital plate are back exposure, image ablation, main exposure, processing (solvent or thermal), drying (solvent), and post-exposure/finished plate which can be grouped into three key control points:1. Ripped Digital File2. Imaging (mask ablation)3. Processed/Finished PlateRipped Digital FileOnce the digital file is ripped, it becomes the digital negative and cannot be manipulated. All information of the image, tone curve, and metadata is contained within the file and is used directly by the imaging device. Therefore, when reviewing this type of file, it is important to consider:· Image resolution· Orientation of the image (right reading/wrong reading)· Linescreen, angle, and dot shape· Screen configuration (halftones and solids)· Compensation (bump and printing curves)· Dimensional accuracy (distortion)· Registration marks or guidesAll elements of the ripped file must be verified and certified that they correctly adapt to the standards defined by both: the basic workflow and those unique to the job. The use of an application, such as a bit-map viewer software (Image 2), for the visualization of this type of file is an excellent process control tool. Image 2. Esko Grapholas visualization toolImaging (mask ablation)The quality of the image ablation on the carbon mask of the plate is a function of the raw material and the adjustments of the imaging device and its condition. The plate manufacturer must ensure a uniform and consistent application of this layer to avoid problems during ablation and/or exposure. Before and after ablation, the mask should be checked for visible marks, scratches or abrasions. Remember, at this stage, the plate is more susceptible to damage because it has yet to be cured. Measurements must be obtained during this stage by a tranission densitometer, the following apply:1. Fidelity of the image (focus adjustment)2. Density of the mask from 3.5 to 4.33. Stain level of the plate after the device removes carbon mask (Dmin) <0.074. 50% Density on 0.30 +/- 0.02It is important to maintain a consistent ablation on any digital imaging device with any digital plate. Ensure the laser is properly focused on the carbon mask to concentrate its energy in the allest possible area and achieve a clean removal. Defects due to poor focus are seen as visual lines in areas that have been removed or malformed dots (Image 3).Image 3. Out of focus ablated imageA weekly ablation test should be carried out to monitor that both the device and the material do not vary from their original setting parameters. Using a tranission densitometer (Image 4), standardized targets are measured; these consist of 100% and 50% removed areas which are compared to the material with the mask removed manually. (NOTE: Calibrate the tranission densitometer with the control strip supplied by the manufacturer to confirm the correct amount of tranitted light is consistent with the amount tranitted when the unit was manufactured.) If the readings are below recommended targets, then there is too much energy being applied by the laser and the physical size of the dots will be larger than desired. On the contrary, if they are higher, then very little energy is acting on the plate to remove the carbon mask, resulting in lines present in solid areas and aller than the desirable dot size affecting the applied bump curve. In either case, the energy (mJ/cm2) applied to the plate must be adjusted by modifying the RPM or power. Finished plateAfter the plate is processed, it is necessary to carry out measurements to ensure specification compliance. These results are dependent on the condition of the platemaking equipment and adequate monitoring of the processing conditions found during optimization. You should consider the following control points:· Caliber· Relief· Dot formation· Tackiness· CleaningCaliberBoth the caliper and the relief can be measured with an analog or digital reading micrometer (Image 5).(NOTE: Calibrate a micrometer using a precision block placed between the surface to ensure the readings are accurate.) Image 5: MicrometerThe test area must be at least 1" x 1", and multiple measurements throughout the plate are necessary to determine uniformity. The caliper of the plate is one of the most important factors when controlling the impression setting on the press machine; any low spot will not print or will cause overprinting for the remainder of the printing plate. All areas must be at full print height including solids and halftones. Flexographic Image Reproduction Specifications & Tolerances (FIRST) specifies variations for raw material thickness of digitally-imaged photopolymer plates and sleeves as follows: Within the same plate: +/- 0.0005" (0.0127 mm) Within a set of plates: +/- 0.001" (0.0025 mm) The flatness of the finished plate depends on the platemaking process; however, any variation will be accumulated with those of other variables, so the lower the better.ReliefThe relief specifications must be defined and confirmed depending on the caliper, the graphic details, press machine requirements, and other variables. Target relief specifications should be confirmed with the printer.Dot FormationThe accuracy of the dot and the formation of the minimum dot is inspected with a microscope (100X) and a flexo plate analyzer. Specific characteristics are evaluated and verified to confirm a successful minimum dot; this method ensures that, although the minimum dot is all, it can be used as an effective control point. This may or may not be the dot percentage used in the production job (Image 6).Image 6: MinDot test with two different screen configurations (stochastic and circular)Once the allest stable dot has been determined, the objective in the production of plates is to maintain this stable value by type of plate. Considerable changes in processing conditions can lead to considerable deviations (e.g. changes in UVA light emission intensity, etc.). Additionally, a control strip must be recorded and processed with each plate for immediate verification of the consistency, not only of the platemaking but also of the compensation curves applied (Image 7). The use of a constant objective provides a single set of standards and tolerances to meet.Image 7. Prepress scale where the values that must be measured on the plate for each tone are labeled. Source: FIRSTTo verify the tonal accuracy of the finished plate, tools such as flexographic plate analyzers are used to measure the size of the halftones. Utilizing this tool improves process control, production efficiency and consistency of print quality. We recommend the BetaFlex Pro and the Plate to Print to create a record of the data collection verifying the specifications of the plate have been met. In any case, whatever the device used, calibration procedures and the process of taking measurements must be clearly documented along with the approval/rejection criteria. Finally, it is important to consider the following frequency of operations to maintain stable conditions:1. Measure and record the lot number, relief, caliper, minimum dot percentage and halftone percentage of at least one color of each job. 2. Conduct a weekly "MinDot finder" test when there is a lot change of the photopolymer plate. This weekly test will help establish an appropriate main and back exposure.3. Perform a daily "focus test" and a weekly "stain test" every time there is a lot change This testing will confirm adequate mask ablation. Maintenance for cleaning lens optics and changing parts must be programmed with the manufacturer.4. Conduct a bi-monthly audit of the intensity of the UV exposure lamps. It is recommended to change lamps when the readings fall below 80% of their original power especially for jobs that incorporate special effects in the highlights or solids.5. Weekly measure the Brix degrees or density of the processing solvent and adjust according to the manufacturer's recommendations.6. Review the back exposure at each lot change and adjust accordingly.7. Only back expose plates that will be used in less than half an hour.There are many more initiatives that can be incorporated, but a quality control process must aim for continuous improvement based on the customer's needs. The process should detect any defects in the early stages of the manufacturing process where the cost is much lower than having a defective product in the machine. It should also be noted that a quality control program involves raw materials duly certified by the manufacturers. The goal is to reduce waste, decrease reprocessing, and increase consistency. The return on investment in these types of programs is easily justifiable when packaging is produced consistently, downtime costs are reduced, margins are improved, and time-to-market is reduced. At MacDermid Graphics Solutions, we not only offer quality products under the tightest tolerances, but we also have a team of specialists willing to help you implement this type of initiative to increase your competitiveness.
1356 views0 0
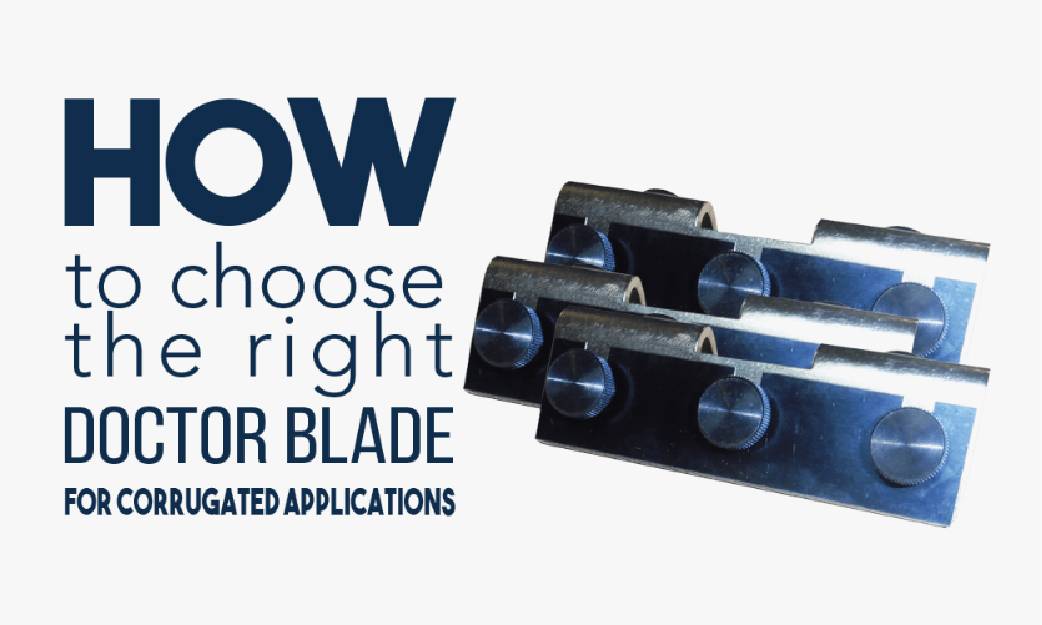
How to Choose the Right Doctor Blade for Corrugated Applications
As the marketing manager for a prominent company within the flexo industry, I field questions about doctor blades on a regular basis. By far the question that I am asked the most about blades is, “How do I choose the right blade for my corrugated application?” I’d like to take a few minutes to answer that question in terms of high quality graphic board printing and get you headed in the right direction when it comes to making your blade selection.An absolute necessity in printing top-notch graphics is crisp doctoring performance. Proper metering will ensure that you have the correct amount of ink being laid down to create the fine images that your customers require. In general, you want a blade that ticks the following marks: long-lasting, non-abrasive, not prone to shattering (making it far less dangerous, among other obvious benefits like durability), heat and chemical resistance, and the blade must work with a wide range of inks and coatings. There are other requirements that can be added to that list, but meeting these overall standards is the best place to start and will guarantee you’ve made a wise blade choice.There are so many blades available today that it can be overwhelming to decide which is right for you. Because of this wide selection, it’s good to know more about what you’re looking for prior to taking the leap and purchasing one. In the next few paragraphs, I’ll give you the details on the two key characteristics to think about when it comes to blade performance: shape and material.A quick overview tells us that there are four main shapes of doctor blades, with varying uses for each. There are also five different materials that are commonly used in today’s industry, each with its benefits and drawbacks. We’ll cover the different shape options first and then get into the materials.The four main blade shapes are stepped, beveled, square edge and rounded. Stepped blades, otherwise known as lamella blades, come in varying lengths and consist of a thick end and thin end. While the thinner end, the one that comes into contact with the roller, provides great metering, it also wears out faster than its alternatives simply because there’s less of it. Rounded blades are exactly what they sound like: round on both sides. This roundness provides an even metering throughout and can be mounted either way. Round blades are generally constant throughout the run, but their thickness is less than ideal.The third category is a square edge blade. I strongly recommend against square edge blades for any type of doctoring because there is no oothness about it – your best bet with one of these is to use it as a containment blade, preferably one made of plastic. And lastly in the realm of shapes: the beveled blade. A very common choice because of its immediate metering application, but it needs to be tightly monitored for wear because the ink film often increases as the contact edge grows from use.Doctor blade materials, on the other hand, are a little more complicated of a subject than that of their shape. There are five materials commonly used to create blades today and they are as follows: plastic (UHMW/UHMWPE), stainless steel, carbon steel, tool steel and graphite. While the steel blades have upsides and are favored by many within the industry, current trends and advancements in technology are heating up the playing field for plastic and graphite.In recent days, the most popular blade on the corrugated market has been the ultra high molecular weight polyethylene blade, or UHMWPE. A major reason for its popularity is that this particular material has a phenomenal lifespan. However, one of the biggest downsides to using this blade is that when it is used under high pressure for long periods of time, it tends to relax slightly. This relaxation means that the blade will not be doctoring as efficiently as it could be – a characteristic that is not ideal for high quality graphics. Still, there’s a reason that it’s popular: when utilized under correct conditions, it’s a great blade.The three steel-based choices are stainless, tool and carbon. Good, high quality carbon is a great choice. Strong and reliable, it gives you the wonderful benefit of a thinner blade. If you go the carbon route, however, be sure not to skimp – inferior blades often result in debris (usually in the form of slivers) that causes scoring and print streaks. Stainless steel blades, on the other hand, are softer than carbon but a good alternative if you’re concerned about corrosive issues. The downside is that the softer material wears down faster, so a close eye on maintenance is necessary; stainless debris is no better than other steel debris, however, stainless is non-ferrous and the fragments won’t be picked up by magnets which can result in other issues. And lastly in the steel category: tool steel. An excellent choice of blade material because wearing comes in tiny particles like talcum powder, often extending the life of both blade and roll.My personal choice for a doctor blade is one that performs like a steel blade but isn’t: graphite blades. In general terms, I recommend it for all-around performance metering, lifespan, anilox roll life and safety. The downside to graphite is that it typically doesn’t allow for the same level of metering as steel. That said, its construction provides improved spring strength and a less abrasive tendency than metal, meaning longer lifespans for your anilox rolls. Typical graphite blades aren’t notch-sensitive, making shattering very unlikely. They also have great thermal and chemical resistance properties so they’re less prone to warp or twist when heat is introduced. This last property means that they can be used with essentially any ink or coating in modern-day converting – and that’s a feat in itself.Hopefully this has cleared up some of your questions about selecting a doctor blade and the characteristics you should look for based on your application. In the end, it’s up to you to decide what’s best for your business, but our team at Pamarco is always willing to help you with any details regarding your choice. Don’t hesitate to contact me if you have any questions or would like further information about making your next doctor blade selection.
1211 views0 0
Select different types of die cutter according to the paper
1. Fluffing and dusting of die cuttingCause of the problem: in die-cutting, often die-cutting products edge is not ooth, fluffing phenomenon, especially from the indentation line near some of the edge cutting situation is serious. This is due to the die-cutting press, the die-cutting plate on the rubber strip, indentation steel wire on the paper produced tension, paper was not cut through when the tension was produced, there was a burr. Solution: first according to the paper to choose different types of die-cutting knife. Die cutting machine knife includes straight line knife and cross line knife. The two kinds of knife edge have high and short points. The difference between the lines and high and short formed by the knife edge is directly related to the service life of die cutting and die cutting knife. The straight blade is better than the cross blade in avoiding the fluffing of die cutting, and the short blade is better than the high blade in service life. In the process of die-cutting covered paperboard, straight grain high blade knife should be selected, and the blade is required to be grinded, so it is not necessary to use the one-time forming process of pressing concave convex, otherwise the pressure will have a great impact on die-cutting; while in the process of ordinary paperboard, short blade knife should be selected, and the blade pattern should be determined according to the paper fiber. 2. The indentation of die-cutting machine produces "broken line" and "dark line Cause of the problem: "burst line" refers to the paper fiber breaking or partial breaking due to the excessive pressure of die-cutting indentation, which exceeds the bearing of paper fiber; "dark line" refers to the unnecessary indentation line, which is generally due to improper selection of die-cutting plate and indentation steel line, improper adjustment of die-cutting pressure, paper difference, paper fiber direction and die-cutting plate cutter row direction, and paper moisture content. Low flexibility, etc.Solution: select the appropriate die-cutting plate; adjust the die-cutting pressure properly; put the printed matter to be die-cut in the workshop for a period of time before die-cutting; improve the relative humidity of the workshop environment. The better method is to reduce the height of the indentation steel wire, which is usually 0.1-0.2mm, which should be determined quantitatively according to the paper. The height of the indentation steel wire that needs to be reduced for the paper with the ration above 350g / m2 is 0.2mm, and the paper with the ration below 350g / m2 should be reduced by 0.1mm.
1355 views0 0
Solution to the problem of discoloration in carton printing
When we use ink printing machines, we often meet the situation of color change. The following are the solutions to prevent the color change 1. First of all, we should check if the printing plate design is reasonable, such as the large amount of ink pattern in the drag position, this is certainly not conducive to our printing high quality printing products, we should put them in the mouth position, which is conducive to hunting control teeth on paper, easier to print printing color, after doing this print we may be able to solve the problem of discoloration, can not be resolved, if after these efforts,the color still change, inform the maintenance company, to solve the problem quickly. 2. if none of these crystalline substaafter we excluded the design problem, we should check whether there is a problem of ink system, check the ink system we can use a very simple method, first we use the water to clean the ink system, and check if there is white rime, if we have found the existence of such substances, so the discoloration may be by crystalline material, this make the local color change normally.we restart the printing machine, ink to each roller, then we close on version roller and the version of the water roller, check whether the pressure reaches the standard, if not, it recommend that all the rollers pressure re adjustment, has reached a better state.
1163 views0 0
4 Mistakes To Avoid When Buying Flexographic Printing Machinery
You may think that, once you’ve decided to purchase a flexographic press in principle, that your work is done. However, getting to the point of making a purchase decision – lengthy as this may be – is only part of the process. There are several common errors which can occur, both during and after purchase, that can make your new press more of a challenge to work with than it needs to be. This article will cover four of these commonly-made mistakes.1) Choosing Surplus Features | Not Choosing The Right FunctionsModern flexo presses have many new technological options to choose from. From automation and colours to efficient drive systems and optional add-ons, you will likely be tempted by many features, but do you really need them? You will need to look at your current budget and needs, as well as into your business’s future growth plans for the answer.What kinds of jobs do you currently complete for your customers? Do you expect the types of jobs you do to change, and if so, how? Finally, will those changes require a particular drying system, automation level or one or more optional components? It may be that you have some extra capital to invest in a conveyor system, web cleaner or additional drying system, but if it won’t add value to what you offer or provide you with long-term ROI, it could be money wasted.On the other hand, not having enough of the right features in your press can quickly set you behind the competition. If this is the case, you will need to think about how far this may put you behind, and whether there is a way for you to make the additional investment and obtain those needed elements.The process of choosing the right press can be frustrating. For many businesses, it can lead to choosing a press that has a lot of advanced features, but that won’t be used to its full potential. In order to choose the best press for you, you should match your features with your plans for growth and expansion over the next five years, and choose a press that can grow with you to maximise your production potential.2) Not Choosing A Machine That Works With YouMany businesses will purchase a modern flexo press, and then modify their processes according to the capabilities of that press. This is a common error. The press chosen should be the one that’s most suited to your current process. The way to determine suitability is to test the press before you buy. A top priority when purchasing any flexo press should be to ensure that it can print at the level of quality you require for the substrates you will be printing on.3) Going For A Bargain PressThere’s nothing wrong with wanting to save money, especially on an investment as large as a new printing machine. However, where it comes to buying a flexo press, going solely for the lowest possible cost is not advisable. Whether a machine is cheaper because it is used, was made in the Far East, or doesn’t have many features, not considering the long-term benefits of spending more will be to your detriment. As well, a lower-cost press may also not be as easy to set up, be able to complete jobs as quickly or be as energy efficient as a more expensive machine. You need to think in terms of total cost/benefit over the lifetime of the machine, and not simply about your initial investment.4) Putting It Into Service Too SoonToday’s flexo presses are impressive pieces of machinery, able to produce high-quality at incredibly high speeds and allow for many functions to be carried out automatically. Even so, they do require some time to master. Placing a press into service before your operators have had the chance to fully understand how it works can have many negative results, including inadvertent damage being done to the machine. Enough time must be given to ensure not only that proper training has taken place, but that what was learned was correctly retained.
1373 views0 0

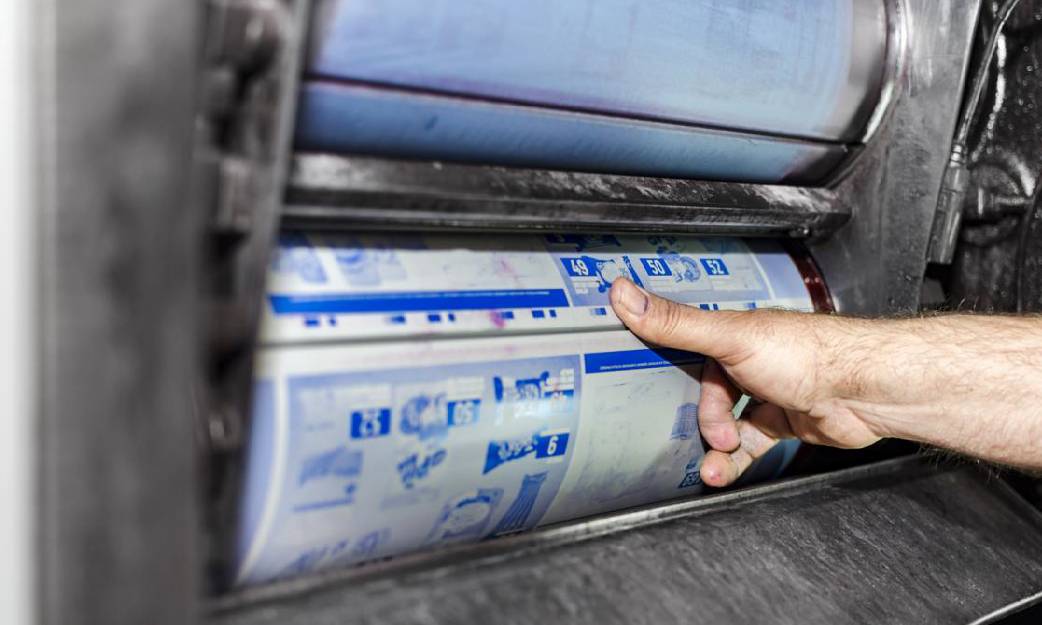
Doctor Blade Installation: Correct Angle and Pressure are Needed for Consistent Performance
The anilox roll and doctor blades are designed to work together to deliver a precise amount of ink to the plate. It is important to take time during a doctor blade installation in order to ensure print quality. A doctor blade that’s installed correctly will have uniform, balanced contact with the anilox roll and remove ink consistently across its surface. Blade positioning, orientation, angle and pressure will affect the delivery of a precise amount of ink to the plate, and proper installation will give the printer control over consistent, repeatable print quality.Doctor Blade InstallationPositioning and OrientationIt is essential that the metering and containment blades be positioned correctly when they are installed. Depending on the rotation of the anilox roll, the metering blade could be positioned on the top or the bottom of the chamber. Keep in mind that the metering blade is always the last blade to contact the roll before the ink transfers to the plate. The containment blade is installed in the opposite location. If the two blades are installed in reverse, the metering blade will not achieve the appropriate point of contact with the roll and remove the correct amount of ink before transfer. It is important to remember that the bevel tip should point away from the roll or towards the chamber to prevent streaking.AngleThe angle at which the blade comes into contact with the anilox roll is also crucial to proper doctor blade installation and optimum blade performance. Ideally, the contact angle should be 30° tangent to the anilox rollcircumference. In reverse angle and chamber blade applications, the doctor blade angle should be between 28° and 32°. If the blade angle drops below 28°, a larger part of the blade’s edge will come into contact with the roll. When this happens, the contact area is too big to meter effectively and the blade may allow ink to pass underneath or “hydroplane” at high speeds. If the angle exceeds 32°, it will result in faster wear on the blade.PressureWhen a doctor blade chamber is properly aligned, light pressure between the anilox roll and doctor blade is all that’s needed to produce a clean wiping action. The recommended pressure is 25 to 30 lbs. or 1.7 to 2 bars. Anything more than that will lead to a deterioration in print quality, wasted ink and substrate, and accelerated blade and anilox wear.A good way to tell if you’re using the correct amount of doctor blade pressure is to look at the roll once it’s inked. Before increasing pressure, the anilox roll will appear glossy. This is a sign that too much ink is remaining on the surface. Pressure should be increased gradually until a satin finish appears on the surface of the roll. A satin finish is a good indication that the correct amount of pressure has been achieved and the doctor blade is effectively shearing the excess ink from the roll. If pressure is increased beyond this point, the doctor blade edge will bend and hydroplane. The roll will again begin to look glossy because it is flooded with too much ink.The doctor blade plays a key role in the performance of the anilox roll and the printer’s control over print quality. Take the time to double-check blade positioning, orientation, pressure and angle during doctor blade installation to guarantee that the anilox roll delivers the precise volume of ink for which it was designed.
1267 views0 0

6 Factors of Maintaining Plate Quality
Platemaking is a science, not an art. While there is a bit of flexibility in specifications for different processes, there are defined parameters that must be followed if high quality plates are to be made consistently. In this article, we’ll discuss six important factors for making high quality plates.1. Relief DepthRelief depth is the difference in height between the printing surface and the floor of the plate. We can obtain this measurement by measuring the overall plate thickness, then subtracting the floor thickness.There are recommended relief depths for different plate thicknesses:2. Imaging QualityWhether you’re using digital or analog plates, the finished plate cannot exceed the quality of the original image carrier. If you’re making analog plates using film, confirming proper film density (over 4.0) is critical. With digital plates, the digital imager must to be checked for correct focus and power settings periodically (every 4 to 6 weeks, or any time the laser head is contacted by a loose plate). These tests can be done yourself with the proper tools and training, by your digital imager supplier.3. Exposure ConditionsPlate exposure units contain two types of UV bulbs: UVA bulbs (for back, main, and post exposures), and UVC bulbs (for light finishing). For maximum plate quality, these bulbs must be monitored and replaced at the end of their useful life. While extending exposure times to make up for weak bulbs can work in a pinch, this tactic sacrifices plate quality. Longer exposure times can lead to broadening of the plate’s shoulder angle, resulting in dot gain and filling in of fine reverse detail (especially with analog plates). In addition, the plate room environment should be kept clean and free of dust to prevent any unwanted debris from contaminating the plate before or during exposure.4. Polymer SaturationBoth solvent and aqueous platemaking use liquid to wash away the unexposed photopolymer in the plate’s non-printing areas. This liquid, whether a hydrocarbon solvent or water, will eventually become contaminated with dissolved polymer solids. The level of saturation, or percent solids, can have a dramatic effect on both plate quality and equipment maintenance. In solvent platemaking, it’s recommended to keep the concentration of solids below 6% to ensure optimum plate washout and keep equipment maintenance to a minimum. If the solids are allowed to collect above this level, the result can be increased washout time, which results in a longer dwell time in solvent for the plate, culminating in a longer drying time. Extensive cleaning may also be needed to remove excess polymer buildup throughout the system. In aqueous platemaking, weekly solution changes and machine cleanings are key to trouble-free operation. Since aqueous polymer doesn’t dissolve completely in water, there is a chance that all particles of polymer could re-deposit onto the plate if they are not removed from the system. It is essential that these machines are kept clean and proper filtration is used to manage the washout solution. The exception to this rule is thermal plate processing. Since thermal processors utilize a one-time-use wicking media to remove the uncured photopolymer, there is no polymer saturation to monitor– only the amount of wicking media remaining in the machine.5. DryingOne of the most important, yet most overlooked factors in solvent plate quality control, complete drying is crucial to consistent platemaking. Incomplete drying can be caused by a number of factors including early removal of the plate from the dryer, inadequate dryer air circulation, and improper drying temperature. To check a solvent plate for complete drying, remove the plate from the dryer and allow to cool for 5 minutes. Next, measure the overall plate thickness with a micrometer. The plate should be no thicker than 0.001” – 0.002” over the original plate gauge (be sure to measure the original gauge on a sheet of raw material). When plates are not completely dry, they remain swollen from absorption of solvent. This can lead to problems on press including poor registration, over-impression, and decreased plate life.6. Plate HandlingGood plate handling and storage practices can save time and money with both press downtime and plate remakes. Plates should always be handled with care, and treated as a fragile component of the printing press. Never place objects on top of plates, fold/crease plates, or expose plates to unknown chemicals. Plates can be only be stacked flat when foam or parchment paper is placed between them to prevent direct contact. Environmental factors that can harm printing plates include exposure to room light or sunlight, and storage near ozone-producing equipment (most common offenders include: HVAC and electrical equipment). To ensure maximum plate life, used plates should be cleaned as soon as they are removed from press using an approved cleaner and a soft horsehair brush. Another great option for plate cleaning is an automated plate cleaning machine. These simple machines make quick work of dirty plates, produce consistent cleaning results with minimal labor, which streamlines the post-press workflow and makes the most of valuable employee time.By following these simple steps, you will ensure that your platemaking and storage is as efficient and effective as possible.
1434 views0 0

Flexo vs Other Printing Methods
Flexography, or flexo, has moved to the forefront of popular printing methods, with its capabilities consistently growing and expanding as consumer demand shifts. As the printing industry moves forward into 2020 and beyond, let’s take a fresh look at the technology available, how flexo has changed to meet consumer demand, and how 5 other popular printing methods compare.What is the Difference Between Flexo & Litho Printing?Both flexo and litho printing can produce reliable prints in very high volumes. They can be used to produce quality product packaging, labels, and a wide variety of printed paper materials.While lithographic printing might dominate some markets, flexo printing has increasingly gained popularity since the 1970s with the introduction of direct laser engraving.COST:Litho can accommodate foil stamping, spot gloss, embossing, and other embellishments, but these options also come at a higher cost.Additionally, since the only way to print with litho is through an indirect pre-print, this guarantees an additional step in production and thusly raises costs.Both processes can be very cost-effective when printing large runs with basic needs. With proper maintenance and storage, as well as an investment in durable image carrier materials, flexo image carriers can be reused many times before they need to be replaced.SUBSTRATES:Litho is generally limited to printing on ooth, flat surfaces as the image must be pressed onto the substrate. Printing on corrugated substrates requires an additional step in production where the images are first printed onto linerboard, which is then attached to the corrugated substrate.Flexo can print on both porous and non-porous surfaces, making it ideal for a wider variety of substrates, including coated linerboard and paper.INKS:Litho generally uses oil-based inks, and printing usually consists of the four process colors, each requiring a dedicated printing station.Flexo also utilizes one image carrier per color and can use oil-based inks; it additionally accommodates printing with a wide variety of other inks -- including water-based, solvent-based, and UV inks. Curable inks, such as UV, afford faster drying times. Faster drying can lead to faster production runs. IMAGE QUALITY:Flexo is noted for producing superior print with fine line and text detail.Making the final decision whether to print using the flexo or litho process depends on the substrate, budget considerations, and a number of other production requirements.What is the Difference Between Flexo & Digital Printing?COST:Flexo is a more cost effective option than digital for high-speed and high-volume printing needs. Being a continuous printing solution, there is little to no press downtime.However, for short runs, digital printing is considered more cost effective due to the comparatively minimal initial investment in materials and quick set-up time. INKS / SPEED:Due to the fast-drying inks that are compatible with flexo printing image carriers and presses, flexo is a great option for applications where speed is of utmost importance.QUALITY: For some industries, digitally printed final products may be less durable than ones printed with flexography. This is a particular consideration when printing products intended for outdoor use, or needed to withstand many years of display.What is the Difference Between Flexo & Gravure Printing?COST AND LEAD TIME:Gravure image carriers are typically much more expensive than Flexo, making the number of prints required to break even much higher. Gravure, however, has a longer press run time as the cylinders do not require as frequent changing as Flexo.Gravure lead time is usually 3-4 times that of Flexo in the time it takes to manufacture the image carrier.SUBSTRATES:One of the limitations of gravure printing is that it generally better suited for porous substrates. This is one of the reasons that gravure is best suited for high detail printing on applications such as magazine covers.That isn’t the case with flexo printing, which is able to print on both porous and non-porous substrates, making the technology ideal for everything from film to paperboard.INKS:Another key differentiator is the range of inks Flexo is able to print with. Gravure is more limited in the inks that it works with, often making Flexo the superior choice due to the ease of printing with a wider variety of inks.Gravure requires much more ink per print, which can drive up the cost of printing.ENVIRONMENTAL CONSIDERATIONS:Due to the fact that Gravure is traditionally associated with solvent based inks, although water based ink capabilities have been evolving, Flexo is commonly considered the “greener” options. Flexo generally has more options for VOC considerations,and the press operations are associated with more environmentally friendly practices.QUALITY:Gravure was once considered best for fine detail and tonal work, but Flexo technology is further enabling prints with higher resolution and detail as it evolves -- enabling it to move into print jobs that were previously associated exclusively with Gravure.What is the Difference Between Flexo & Offset Printing?INKS:Flexo is able to operate with many more types of inks.Offset generally works with inks that are oil-based along with using some water-based and UV curable inks.MAINTENANCE: One thing to consider about offset is that the plates used in the process are susceptible to oxidation if they're not cared for properly. For this reason, extra maintenance is often necessary to ensure plate quality.AFFORDABILITY:Flexo image carriers are generally a bit cheaper to create, and they also are typically more durable than the plates used for offset -- meaning they can be re-used a few times before replacement is necessary.What's more is the wider range of inks that flexo works with (notably the faster drying times with low viscosity inks and UV inks) can accelerate print jobs and increase job profit.CONVENIENCE:As noted briefly above, offset printing can only be accomplished on a ooth, flat surface. Flexo, on the other hand, can print on a wide variety of substrates, making it a more convenient choice for many.Combine this with Flexo’s ability to use many more types of ink and the ease of printing more large-scale tasks, it is often hailed as the superior choice.Flexo Printing vs Screen PrintingSUBSTRATES:The substrates available for screen printing, specifically rotary screen printing, are limited when compared to flexo. The most common substrates used for screen printing include:?Textile?Sign board?Film?PaperThough flexo is not a common choice for printing on textiles, it does support a wider variety of substrates and executes detailed prints.INKS:In general, the majority of inks used for rotary screen printing are UV curable, especially for use in narrow web applications. There are some projects, however, that require solvent based inks, which can be used.When it comes to color, white ink is the most popular in the screen printing market. Flexo utilizes a wider variety of inks. A full guide to the inks used in flexo printing, and the considerations based on application, can be found here.SPEED:Due to the high number of jobs that utilize UV curable inks, print speed is largely dependent on the ink, and more specifically the amount of time the ink requires for curing. Because of this, print run speeds are slower than that of flexo.
1320 views0 0